

How To Resize Canvas Of Animated Gif Photoshop
Create a fashionable animated GIF in Photoshop
GIFs are dorsum, and many designers – likewise as the Tumblr generation – are using them in highly original and artistic ways to produce conceptual blithe content at very low file sizes. By the cease of this tutorial you will be equipped with the know-how to chop-chop combine images into a single blithe GIF file.
The order, footstep and rhythm will be set by you, equally well as the file size, assuasive for ultra-fast loading time when hosted on a blog or your website. Ultimately, the content is upwardly to you; this is more of a primer on how to quickly produce a GIF using common tools – Bridge and Photoshop.
Step 01
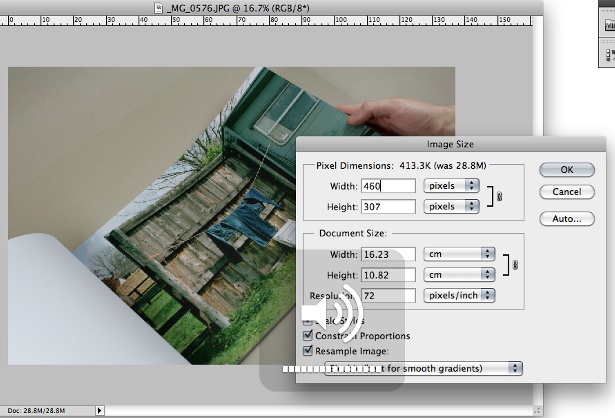
To begin, you lot need to locate all the images you lot wish to combine into your animated GIF and resize them in Photoshop, making them 72dpi, and all the aforementioned width and height. For my file, the images are 460 x 307 pixels.
Stride 02
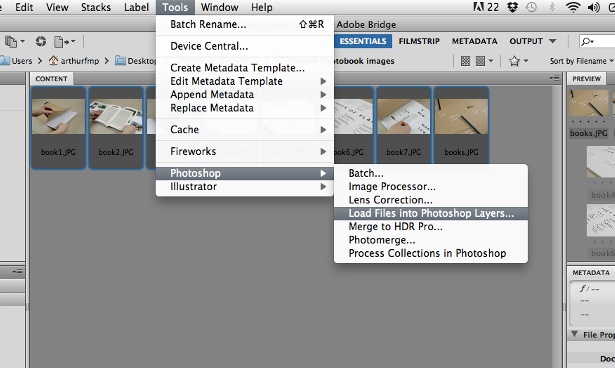
Ensure all your resized images are closed and saved in the same location. Next, click File>Browse in Bridge. Locate your folder and select all the images you want, then click Tool>Photoshop>Load Files into Photoshop Layers.
Footstep 03

The images volition open equally one file with layers. Change the Photoshop workspace to Motion from whatever yours is usually set to. The Animation panel will appear. Click the flyout bill of fare in the height-correct of the panel and select 'Brand Frames From Layers'.
Pace 04
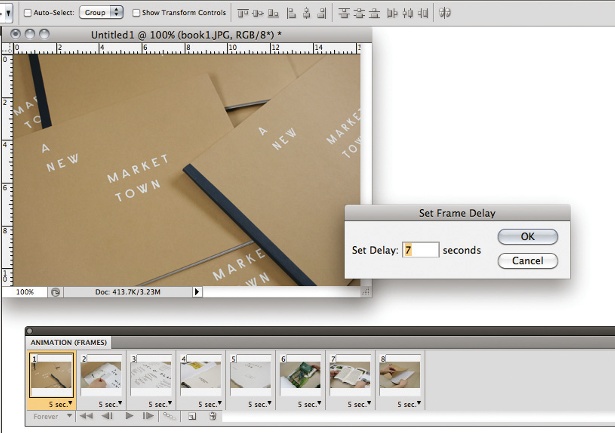
In the Blitheness panel's flyout menu choose 'Make Frames from Layers'. Now, you can specify the number of seconds that each epitome will appear for in the animation (below each frame), giving you complete control over the sequence. Similarly, you can reorder the sequence by dragging the thumbnails around. Select the Forever option in the Looping drop-down at the bottom-left of the Animation panel.
Step 05
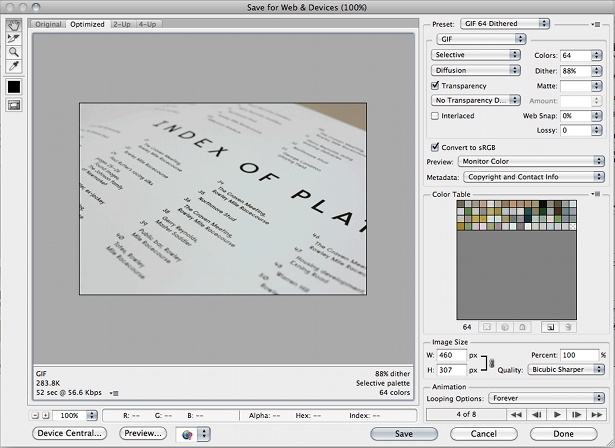
When you're happy, click File>Save for Web & Devices. A dialog box appears – yous might wish to lower the number of colours from 256 down to 64, as I have. If this is not detrimental to your images, doing then will hugely decrease loading time for online delivery. If yous find that at this stage Photoshop is taking a long time to load, check you have resized all your images to the exact pixel size you require (as in step 1). Chose a file location and click Salve.
Find more Photoshop tips and Photoshop CS6 (opens in new tab) info over at Artistic Bloq.

Thanks for reading 5 manufactures this month* Join now for unlimited access
Savor your start calendar month for simply £i / $ane / €1
*Read 5 gratis manufactures per calendar month without a subscription
Bring together now for unlimited access
Effort commencement month for just £ane / $1 / €i
Related articles
Source: https://www.creativebloq.com/animation/video-tutorial-create-stylish-animated-gif-photoshop-9122735
Posted by: castleboloody.blogspot.com
0 Response to "How To Resize Canvas Of Animated Gif Photoshop"
Post a Comment